Introduction
uGUI Sequence Renderer is a uGUI renderer that is used to create bars from sequence of images (just like gif sequence) that can animate forwards and backwards. It’s great for bars with irregular animations.
Usage
You can create new uGUI Sequence Renderer in three ways:
- Select Game Object → UI → Energy Bar Toolkit → Sequence Bar from the main menu
- Select Tools → Energy Bar Toolkit → uGUI → Create Sequence Bar from the main menu
- Click on the
 button in Hierarchy window, then UI → Energy Bar Toolkit → Sequence Bar
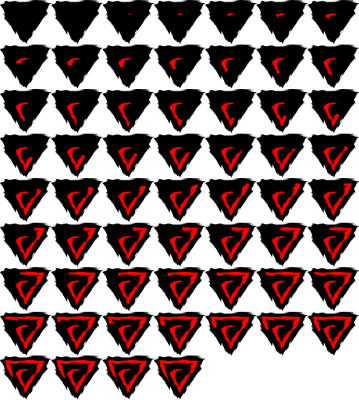
Either way, you will see a new shining bar on your scene:
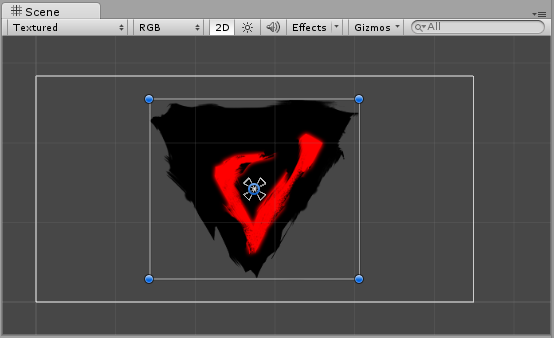
This component is created in a way to display something as soon as possible. By default it’s setup using stock graphics that you probably would want to change.
Configuration
In order to make things easier, Inspector of Energy Bar Sequence Renderer is split to 4 different sections.
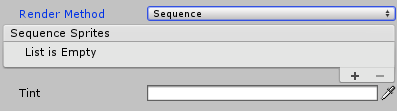
Textures
This sections is separated to three meaningful parts:
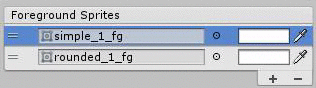
- Background Sprites – The sprites that should be displayed on the background.
- Middle part – The actual sequence
- Foreground Sprites – The sprites that should be displayed on the foreground.
The order is not accidental. The lower (visually) sprite is added, the higher it will be on renderer layer. (The one on the bottom will be renderer on the top.)
You are allowed to add any number of background and foreground sprites. To add a new sprite just click the + (add) button and you can remove it by selecting it and then pressing the - (remove) button. For each texture you can also decide about its tint. The tint of the Bar texture is configurable in the Appearance section.
The middle part
You can render your sequence bar in two modes:
- Grid – Select this if you have one big texture arranged as a grid.
- Sequence – Select this if you have many small textures.
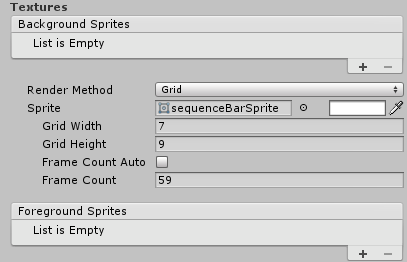
Grid rendering method uses one big previously prepared texture grid, that should look like this:
In order it to work, the grid on the texture should consists of equally sized textures (frames) in regular distances.
For example if one frame size is 64×64, and your animation consists of 4 frames, then your grid can be arranged as texture of size 256×64 (4×1) or 128×128 (2×2). Renderer algorithm will then split the texture to frames based on your grid width & grid height settings.
Grid and Sequence inspectors are a little different, so we will describe the grid first.
Grid mode
This is the same image as above:
- Sprite – The grid texture.
- Grid Width, Grid Height – Dimensions of this grid.
- Frame Count Auto – Frame count is calculated as Frame Count = Grid Width X Grid Height. If your grid has a smaller number of frames (like in the example above), please disable this option.
- Frame Count – The actual number of frames. Frames should be placed left to right, bottom to top on the texture for this to work.
Sequence mode
The Sequence mode consists only of sprite list. Just drag & drop your sprites in here to make it work.
Appearance
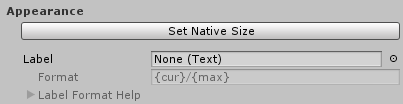
- Set Native Size – Click on this button to resize your bar to it’s native size based on used sprites.
- Label – Choose the uGUI Text object to be used as your bar label.
- Label Format – Format of the label. See description below.
Label Format Description
- {cur} – current int value
- {min} – minimal value
- {max} – maximum value
- {cur%} – current % value (0 – 100)
- {cur2%} – current % value with a precision of one decimal place (0.0 – 100.0)
Examples
- {cur}/{max} – 27/100
- {cur%} % – 27 %
Effects
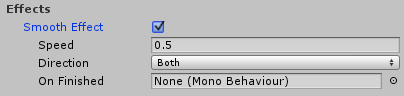
Makes the bar smoothly change its value.
- Speed – Effect speed.
- Direction – When the smooth effect should be visible. The options are Only When Decreasing, Only When Increasing, and _Both.
- On Finished – Specify a object that message should be sent to, when the smooth effect finishes its animation. After assigning the object, you will be able to specify the method name as well.
Debug
The debug section exists for mainly for debugging purposes. If you’re advanced Unity user and/or you will be having troubles of understanding the workings of Energy Bar Toolkit, then enable the debug mode. In debug mode Energy Bar Toolkit reveals all hidden game objects, that normally shouldn’t be seen or modified.